Pages

Showing posts with label summer. Show all posts

Wednesday, August 8, 2012

Gingered Zucchini Orange Bread


I know summer is supposed to be all about fresh produce and farmers markets, but recently all I've wanted to do is bake. So - sneaky me - I found a way to incorporate seasonally appropriate ingredients with my craving for baked goods. The result is a new citrus-y spin on zucchini bread. If you've ever been turned off by the idea of veggies in your baked goods, this bread will bring you around. The glaze on top makes it especially decadent, so add it generously. (I may have dipped a piece of bread in the leftover glaze... perhaps that's a bit too generous.)


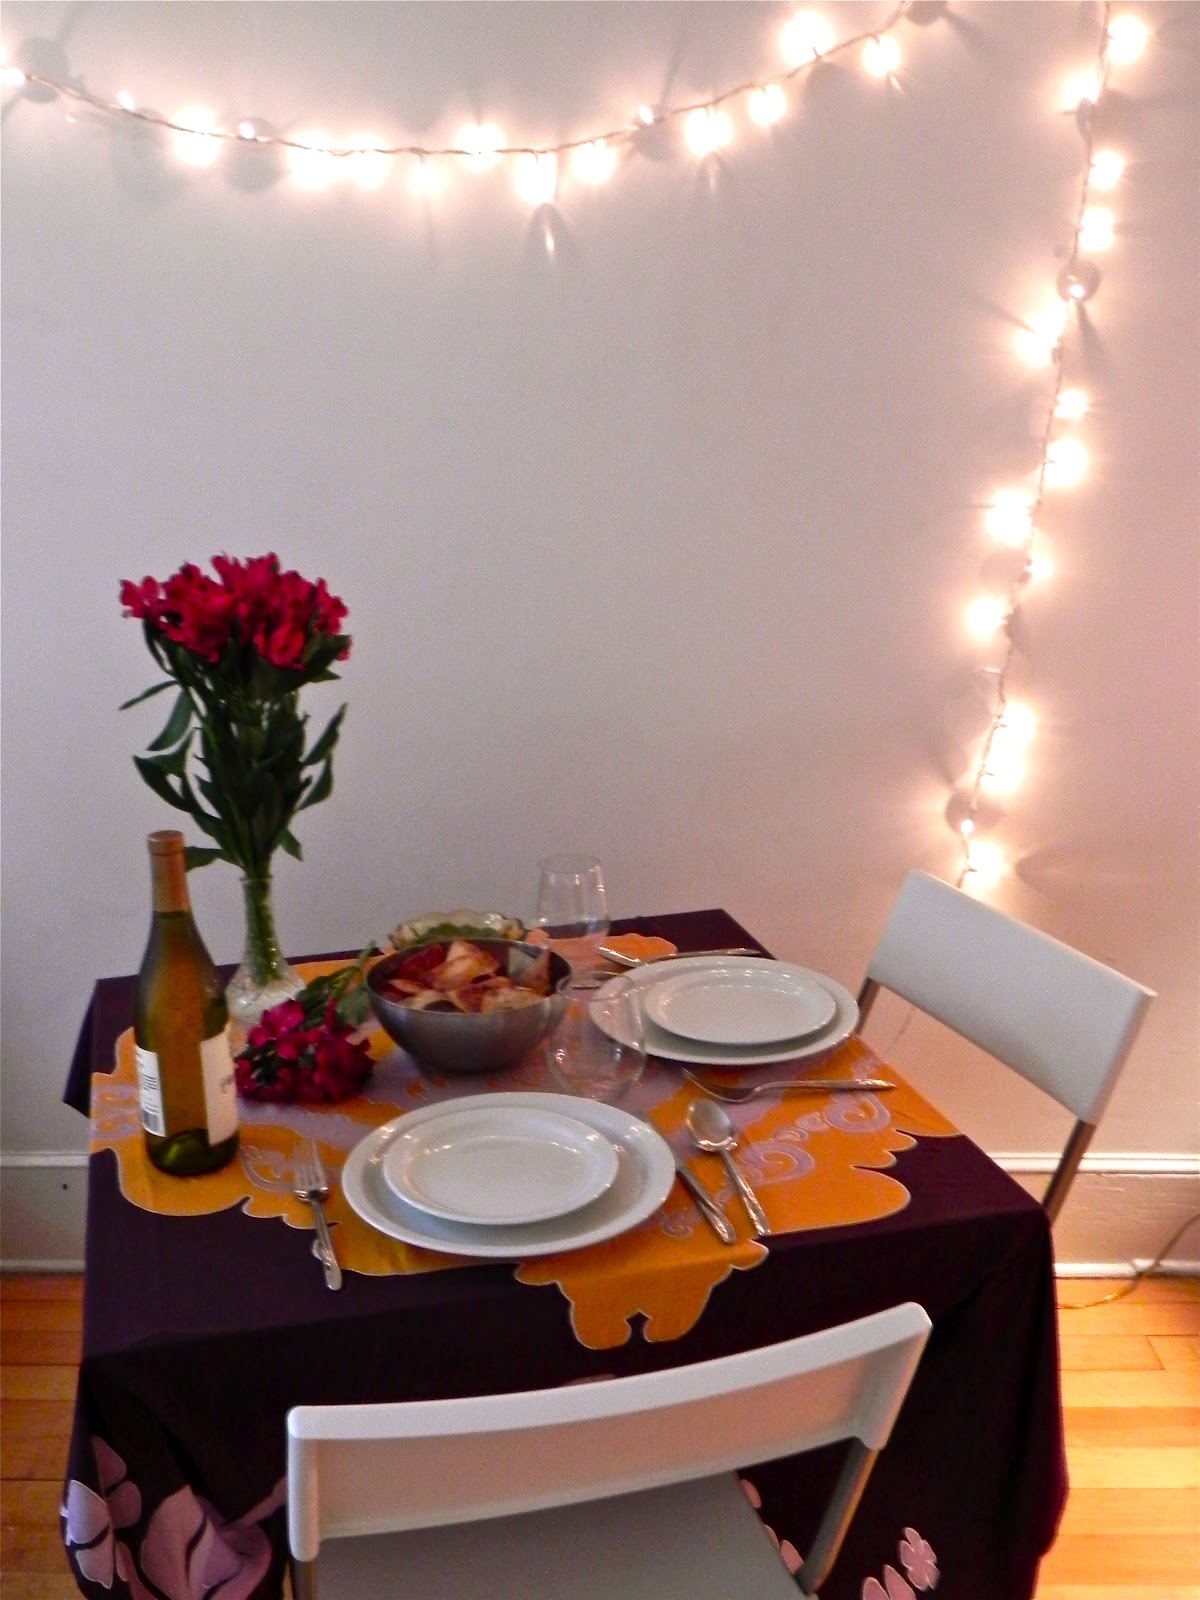
Bread is one of my favorite things to make. There is something very maternal about the process, particularly when it involves kneading with your hands and waiting for the yeast to rise. However, bread is very time consuming, so pour-and-bake loaves like these give you all the pleasures of baking bread without the hours spent. (No knead, har-har.) This batch makes two loaves, so make one for yourself to enjoy and share one with friends! Or not. Your call.


Gingered Zucchini Orange Bread
Makes: 2 loaves  Prep: 20 minutes  Total: 1 hour, 5 minutes

Ingredients
3 cups flour
2 tsp baking soda
1/2 tsp baking powder
1/2 tsp salt
1/2 tsp ginger
1 cup white sugar
1/2 cup brown sugar
3/4 cup olive oil
3 eggs
2 tsp vanilla
2 1/2 cups zucchini
1 cup chopped walnuts
2 tbs orange zest
1 1/4 cup powdered sugar
1 tsp lemon juice
3 tsp orange juice

Directions
Combine flour, baking soda, baking powder, salt and ginger in a large bowl. In a separate bowl, mix together sugars, olive oil, eggs and vanilla.
Using a food processor, shred the zucchini on a grater setting and add to the wet ingredients. Pour the wet ingredients into the dry ingredients in two parts, mixing thoroughly. Add chopped walnuts and orange zest. Pour into two greased loaf pans and bake for 45 minutes or until an inserted toothpick comes out dry.
Combine powdered sugar and citrus juices in a bowl to make the glaze. When the loaves are done, let them sit for 5 minutes. Remove from the pans and set onto wax paper. When loaves are cool to the touch, brush on glaze with a basting brush, letting a little drip down the side. Serve immediately or store in an airtight container.

Tuesday, July 31, 2012

Baja Blackened Haddock Fish Tacos


Happy summer everyone! Since moving back to Boston, I have been crazy busy with classes and picking up my first restaurant job in the city. I'm surrounded by awesome food all the time, but haven't gotten to make my own too much. Last week was Dylan's birthday, so it was my first chance to make something really special. Since his favorite type of food is "Pacific Mexican" (is this even a real type of food?) I spent five hours whipping up a 3-course meal with these fish tacos as the main event. I've never really eaten fish tacos, so I left the official taste test up to Dylan.


So yeah... They were prettyyyy good. In addition to the tacos, I made homemade tortilla chips, my salsa verde from last spring, some beer-battered coconut shrimp with a Mexican cabbage salad, and fried plantains with vanilla ice cream for dessert. We had to take a walk around the park after dinner to make some room for dessert, but it was worth it and made for a perfect night. :)


Baja Blackened Haddock Fish Tacos
Serves: 6 small tacos  Prep: 30 minutes  Total: 40 minutes

Ingredients
6 corn tortillas
1 lb haddock fillets
1 tbs Old Bay spice
1 1/2 tsp garlic salt
1 1/2 tsp paprika
2 tsp pepper
1 cup shredded cabbage
3 pickled jalapenos, sliced
1/3 cup tomato, diced
1/3 cup onion, diced
1/2 avocado, sliced
1/4 cup black beans
3 tbs Crema Mexicana (sub sour cream or mayo)
3 tbs lime juice
1 1/2 tsp paprika
2 tsp jalapeno, finely diced

Directions
Combine Old Bay, garlic salt, paprika and pepper in a small bowl. Lay haddock in a shallow dish and press seasoning onto fillets. Cover efrigerate for 1 hour.
In the meantime, prepare cabbage, pickled jalapenos, tomato, onion and avocado as directed. Bake the black beans on the stove and set aside. To make the white sauce, whisk together Crema Mexicana, lime juice, paprika and finely diced jalapeno.
Fry the seasoned haddock fillets in sunflower seed oil or olive oil, flipping every few minutes until they are completely cook. Lay down corn tortillas and assemble fish, vegetables and white sauce.

Tuesday, November 1, 2011

Slow Cooker Pulled Pork Sandwiches


Happy November, everyone! I can't believe how fast this semester is flying. In a little over 2 months I'll be moving out of Boston and working full time for Johnson & Johnson in New Jersey until July. So crazy how fast this is sneaking up on me! I had an amazing dinner party for Halloween with some girlfriends last night, and it made me even sadder to leave this city. I'm planning to squeeze in all the dinner parties I can before I move, so get excited for a lot more posts to come.

This was the main dish I served for the Halloween party my roommates and I threw yesterday evening. I woke up at 7 to put the pork in the slow cooker before my 8 am class, then took it out at 7 pm right before the party started to shred the meat and add the sauce. I swear by Dinosaur Bar-B-Que sauce, and since the original restaurant is in my hometown I'm a devoted fan.

Also, I definitely recommend cooking the pork for the full 12 hours because the meat literally melts in your mouth. Considering we fed about 12 girls (and 2 lucky boyfriends) I'd say this is the easiest and most delicious go-to party meal I can think of!

Here are some quick shots of the party:

Some of the girls
Snapshot of the dinner
Feeling a little full...
Dylan and me

Hope everyone else had a great Halloween weekend. Enjoy!


Slow Cooker Pulled Pork Sandwiches
Makes: 12 sandwiches  Prep: 20 minutes  Total: 12 hours, 20 minutes

Ingredients
5-6 lbs pork shoulder
1 large onion
4 tbs red pepper flakes
4 tbs paprika
3 tbs salt
3 tbs pepper
2 19-ounce bottles of Dinosaur Bar-B-Que sauce
Sandwich buns

Directions
Slice the onion through the center to create large rings of onion. Lay in the bottom of the slow cooker.
Prepare BBQ rub by combining red pepper flakes, paprika, salt and pepper in a small bowl. Pat the rub all over the pork shoulder, covering evenly. Place the pork on top of onion and fill the slow cooker two-thirds of the way with water.
Turn the slow cooker to low and leave on for 10-12 hours.
When the pork is done, remove from the slow cooker and shred with two forks. Place pulled pork in a large bowl and add 1 bottle of Dinosaur Bar-B-Que sauce. Mix well.
Dump most of the water and juice out of the cooker, leaving 1/4 cup and onions for flavor. Add the pulled pork back into the slow cooker and keep on low until ready to serve.

Sunday, September 25, 2011

Citrus Veggie Quinoa Salad


I suppose you can't really have a food blog these days and not have at least one post about quinoa, right? If you've never had quinoa, there are a few things you need to know:

1) It's pronounced "KEEN-wah", not "ki-NO-wah" or "qui-NO-wah" or any other easily mistakable pronunciation.
2) Quinoa became very popular because of influential food bloggers like Heidi Swanson, who turned an unusual grain into a multi-functional health food staple.
3) Quinoa is kind of a grain, but kind of not. It's like a seed, but more like a grain? Whatever it is, it's surprisingly really good.

So, I made a huge batch of quinoa salad to use as a grab-and-go snack, lunch and dinner this past week. Somehow I've managed to eat the same thing all week and not get sick of it, meaning I'll definitely be experimenting with more quinoa recipes in the near future.


Citrus Veggie Quinoa Salad
Serves: 10-12  Prep: 25  Total: 40 minutes

Ingredients
1 pound boxed quinoa
1 yellow pepper
1 orange pepper
1 small eggplant
2 Roma tomatoes
1/2 cup green onion, chopped
lemon juice
olive oil
garlic salt
pepper

Directions
Prepare quinoa on the stove as directed.
In the meantime, chop eggplant, pepper, tomato and green onion. Cook eggplant in a medium skillet until slightly softened, or about 5 minutes. Add the pepper into the skillet and cook for another 3-5 minutes. Lastly, add the green onion and tomato and cook for one more minute. Remove from heat.
When the quinoa is full cooked, add in mixed vegetables and toss with citrus dressing (1 part lemon juice, 1 part olive oil, garlic salt and pepper).

Sunday, August 28, 2011

Dinosaur Bar-B-Que Honey Hush Cornbread


Hurricane Irene is hitting most of New England right now, while I sit snuggled safely in my house in Upstate New York. I've been huddled on my laptop all day keeping an eye on the storm and all my friends in Boston. I can't think of a better time to introduce a new recipe dedicated to my second home.

Actually, this recipe pays homage to both my homes, here in Syracuse and back in Boston. Syracuse is pretty quaint as far as cities go, but if we're known for one thing (besides Syracuse University basketball) it's Dinosaur Bar-B-Que. This barbecue joint has been famous since I was born, originating right off of West Gennesee Street in downtown Syracuse, and has since introduced locations in Harlem, Troy, and Rochester.

Dinosaur Bar-B-Que was voted America's Best BBQ in a nation-wide search held by "Good Morning America" back in 2009. It has also been featured on the Travel Channel's show Man v. Food. Dylan and I are in a constant debate about the supremacy of Dinosaur Bar-B-Que, as he is convinced there is no {insert noun} better than the one in DC. I've since gotten him to admit that it is "on par" with his favorite barbecue restaurant in his hometown. I'll accept that as defeat.

Dinosaur Bar-B-Que  Honey Hush Cornbread
Serves: 9  Prep: 10 minutes  Total: 40 minutes

Ingredients
1 1/4 cups yellow cornmeal
1/4 cup sugar
3/4 cup flour
1 1/2 tsp baking powder
1/2 tsp baking soda
1 tsp kosher salt
1 cup buttermilk
2 eggs
1/2 tsp vanilla
1/4 cup butter
2 tablespoons honey*

Directions
Preheat oven to 350. In a bowl, combine cornmeal, sugar, flour, baking powder, baking soda and kosher salt.
In a separate bowl, whisk buttermilk, eggs, vanilla, melted butter and honey. Pour wet ingredients over dry ingredients and mix until moist all the way through.
Pour the batter into a greased 8x8 inch baking pan and bake for 25 to 30 minutes.

*In the original recipe, the honey is brushed on top of the cornbread after baking. I decided to incorporate it into the batter for a richer taste throughout. Either way will do the trick!

Wednesday, June 29, 2011

How to Make Lobster Rolls with Five Easy Ingredients


I finally did it! After months of dreaming about cooking up this classic New England creation, I finally made my very own lobster rolls. The sense of accomplishment was overwhelming, but the taste far outshone my pride. This was the last dinner Dylan and I cooked together before heading home for the week to prepare for my Argentine adventures. We made the lobster stuffing the night before, so all we had to do was come home after work the next day, grill up the buns, and overflow them with lobster-y goodness.

Meet Judas.

I was so excited to bring home our new lobster friends, but saddened that we would have to end their short crustaceous lives. I decided we would name them after infamous historical figures to make ourselves (meaning me) feel better about boiling them. Thus, Judas and Brutus came to be. I'd like to think Judas and Brutus had a nice little vacation in our freezer before their time came. I made Dylan cook the poor guys, and he lectured me about how if I'm going to eat meat, I should be able to kill it myself. Somehow I don't see myself hunting wild boar anytime soon.

Here are a few photos of how Judas and Brutus made if from pot to plate.


Yum! After a lot of shell cracking, I started to feel less remorse about Judas and Brutus and more excited for these lobster rolls! Once I had all my meat, I simply mixed in some mayo, lemon juice, scallions and paprika and stuck it in the fridge. Serve with some chips and, if you're looking for a drink pairing, an ice cold Landshark. Bon Appétit!


New England Lobster Rolls
Makes: 4 small rolls  Prep: 40 minutes  Total: 45 minutes

Ingredients
1- 2.5 lb lobster (or 2- 1.25 lb lobsters)
1/4 cup mayonnaise
2 scallions, diced
2 tsp lemon juice
1/2 tsp paprika
Salt and pepper to taste
4 New England-style hot dug buns

Directions
In a large pot, boil lobster for approximately 10 minutes until the shell turns bright red and the lobster floats to the top. (If you're using two lobsters, you most likely will need to cook them one at a time.) Remove lobster and place in a bowl of ice water to cool.
When the lobster is cool to the touch, remove and section off into four pieces: two legs (cut at the elbow joint), the tail, and the body. Begin breaking the legs to remove the meat, including the claws and leg joints. Bend the tail backward to crack the shell, and push the meat up through the end. Don't miss the meat in the fins of the tail!
Once you've extracted all your meat, chop it into small pieces. While the meat is still warm, mix in the mayo, scallions, paprika and lemon juice. Season with salt and peppers and refrigerate for no less than 1 and no more than 24 hours.
Before serving, butter the inside of 4 New England-style hot dog buns and toast until golden brown. Fill with lobster stuffing and serve with a side of chips.

Tuesday, June 14, 2011

Strawberry Rhubarb Crisp


I wish I could say that all the recipes I create come from my all-encompassing knowledge of food chemistry and methodical, precise recipe development with carefully measured ingredients. The truth of the matter is, I know very little about the scientific balance of a macaroon. When I discovered a passion for cooking, I became intent on creating original recipes that reflect my unique taste, which is strongly influenced by my mom, grandmother, and all the delicious home cooking I grew up around.

Everything I cook or bake is more or less a guessing game. I'll get an idea in my head of what I want to make, spend about 15 minutes looking up similar recipes to get a feel for what ingredients I might use, then rush out of the grocery store with a jumbled pile of ingredients that may or may not make it to the finished product. Sometimes A lot of times, this results poorly. Other times, to my surprise, it turns out really freaking good. This was one of those times.


Alright, so "healthy" could be a little bit of a stretch, but compared to other strawberry rhubarb crisps I saw, this one uses much less sugar and butter. The natural sweetness of the orange juice goes a long way in the dish, and I used the minimum amount of butter and oil to hold the oat crisp together. When it comes to dessert, healthy is a relative term. Healthy without sacrificing taste is difficult; the key is portion control, a healthy lifestyle and a balanced diet (with the occasional exception). That said, I'm not going to judge if you have the sudden urge to eat the whole pan.

Strawberry Rhubarb Crisp
Serves: 10  Prep: 15 minutes  Total: 1 hour

Ingredients
3 cups rhubarb
3 cups strawberries
½ cup orange juice
¾ cup sugar
1 tbs vanilla
1 cup flour
2 cups oats
½ cup butter
1 tsp kosher salt
1 ½ tbs vanilla
½ cup brown sugar
2 tbs canola oil
2 tsp cinnamon

Directions
Preheat oven to 350. Chop strawberries and rhubarb into 1-inch pieces and mix in a large bowl. Combine orange juice, sugar and vanilla and mix well. Layer strawberries and rhubarb at the bottom of a greased 8x8 inch pan and set aside.
Soften butter and add in a medium bowl with flour, oats, salt, vanilla, brown sugar, canola oil and cinnamon. Combine until the oat mixture is moist all the way through and spread on top of strawberries and rhubarb. Bake on top of a baking pan (in case of overflow) for approximately 45 minutes until the fruit mixture bubbles and the crisp is lightly browned. Let cool and serve with ice cream.

Monday, June 6, 2011

"The Lure Burger" with Caramelized Onion and Bacon Jam

 
I went home to Upstate New York this Memorial Day for a long, relaxing weekend by the pool. I'll be heading to Argentina in less than a month for a study abroad program, and since it's winter in the southern hemisphere I'm trying to take in all the sun I can get before departing. It was great seeing my hometown friends and celebrating mine and my sister's May birthdays with my family!

Summer in Upstate New York is perfect - 80 degrees, dry and sunny. If I could, I would spend one last summer lounging in my hammock, sipping fruity drinks and reading books by the pool without any responsibilities. But alas, with college comes a transition into adulthood, and with adulthood comes work. Yuck. Why can't I just get paid to cook delicious food and hang out with friends?


Speaking of delicious food, Dylan and I cooked up these burgers before catching a 7 hour bus back to Boston on Monday. Based on the winner of the 2009 Rachel Ray Burger Bash, this recipe was surprisingly easy, totally delicious, and wonderfully... unhealthy. But hey, if you're eating a hamburger anyway, you might as well go all out.

"The Lure Burger" with Caramelized Onion and Bacon Jam
Adapted from Chef Josh Capon of Lure Fishbar's "The Lure Burger" *
Makes: 8 burgers  Prep: 40 minutes  Total: 1 hour

Ingredients
1 1/2 pounds ground beef
4 tablespoons Dijon mustard
Vegetable oil
4 cups white onion, diced
1 pound bacon
1/2 cup ketchup
1/2 cup mayonnaise
1/2 tbs red wine vinegar
2 tsp Worcester sauce
Kosher salt
Coarse ground pepper
8 hamburger buns

Directions
In a large bowl, combine ground beef with Dijon, kosher salt and coarse ground pepper. Form into 8 burger patties and set aside.
Heat vegetable oil in a large pan. Add diced onion and cook on medium heat until caramelized, about 15 minutes. In the meantime, fry the bacon in a large skillet and drain on paper towels. When the bacon strips are dry, chop into fine pieces. Combine bacon bits and caramelized onion in a bowl, add salt and pepper, and mix well.
To make the sauce, mix ketchup, mayo, red wine vinegar, Worcester sauce, salt and pepper in a medium bowl and combine. Refrigerate until serving.
Grill burger patties on an outdoor grill until medium rare. Toast hamburger buns on the grill inside face down for several minutes before serving. Assemble burgers with sauce and onion and bacon jam. Serve with Sweet Potato Fries with Tangy Chili Aioli and fresh fruit.

*I changed the recipe quite a bit, so check out the link for Chef Capon's original burger.

Monday, May 23, 2011

Chicken Tostadas with Tomatillo Salsa Verde and Spanish Rice


My farmers market trip last week was, more or less, an epic fail. I marched down in my rain gear with an empty backpack, ready to stock up on the first produce of the season. Sadly, there were about 10 tents set up in total, with an assortment of baked goods and planted herbs, but no produce. It could have been because it's still early in the season for most crops, or maybe the rain deterred most vendors from setting up shop, but regardless, I was disappointed. This is not to say that the Copley Square Farmers Market is a bust. In fact, I've only heard phenomenal things about it. I still have one month before I leave Boston for the summer, so I'm crossing my fingers to get some good trips in before then.


Instead of getting down on myself, I walked straight to the grocery store and bought ingredients for my Tex-Mex dinner party. It was a huge success, and probably the least time I've spent in the kitchen compared to dinner parties past. I threw some chicken thighs in my crock pot before heading to work in the morning, so by the time I got home the meat was ready to go. I made the same mango salsa I created for my Chicken and Squash Quesadillas, and also tried my hand at salsa verde with these beautifully roasted tomatillos. My friend Shannon, who had just come back from a trip home to Texas, bought me a beyond delicious raspberry cilantro salsa for my birthday. I'm saving the last bits in the jar so I can attempt to recreate it myself.


Because I have a few vegetarian friends, I added Spanish rice on the tostadas to make them hardier for those forgoing meat. I don't know why rice isn't an ingredient in a traditional tostada - it was delicious! Even though my friends ate enough chips and salsa to make themselves sick, they all managed to happily finish their meals before rolling on the floor in agony. (Overeating, aka "food coma", is a regular occurrence at our dinner parties.) All in all, great last dinner party with all of my girlfriends together in Boston. Next time, we'll have to visit Jess in Texas ourselves. We'll miss you, Jess!

Chicken Tostadas with Salsa Verde and Spanish Rice
Serves: 6  Prep: 2 hour  Total: 10 hours

Ingredients
Tomatillo Salsa Verde:
1 pound tomatillos
5 garlic cloves
1/2 cup cilantro
1/2 yellow onion
1 Serrano pepper

Chicken Tostadas:
6 chicken thighs
1/2 yellow onion
1 cup sour cream
1 package fajita spice mix
1 cup water
6 whole wheat tortillas
1 10-ounce package Spanish rice
1 can black beans
1 package shredded cheddar jack cheese
6 red Mexican peppers
Tomatillo Salsa Verde*

Directions
Tomatillo Salsa Verde:
Remove casing from tomatillos and set on a foil-covered baking dish, along with non-peeled garlic cloves. Set the oven to broil and cook for about 7 minutes until tomatillos begin to brown at the top. Remove and cool. Peel garlic and set aside.
Chop up cilantro, onion, and Serrano pepper. Add all ingredients into a blender and puree. Refrigerate until serving.

Chicken Tostadas:
Slice 1/2 yellow onion into rings and lay at the bottom of a crock pot. Place chicken thighs on top. Combine sour cream, water, and fajita mix in a bowl and mix well. Pour over chicken thighs. Cook on low for 8-9 hours. Using two forks, shred meat off the bones and wrap in aluminum foil to keep warm.
Following the directions on the package, cook the Spanish rice in a medium pot. Cook black beans over the stove in a small pot until soft.
In the meantime, heat olive oil in a large pan. Fry whole wheat tortillas 1-2 minutes on each side until lightly browned, and drain on paper towels to absorb excess oil. Dice red Mexican peppers.
When everything is finished, top the tostadas with chicken, Spanish rice, cheese, black beans, red Mexican peppers and salsa verde.

Thursday, May 19, 2011

Quick and Easy Strawberry Kiwi Smoothie


I don't know what it is, but I've been on a smoothie fix recently. I'm pretty bad about eating enough dairy (unless it's cheese or ice cream, I'm pretty good at that). I can't stand milk, so yogurt smoothies are how I've been incorporating dairy into my diet. They take no more than 5 minutes to put together, and it's a great way to use up my fruit before it goes bad. Strawberry banana is a smoothie combo I make quite often and it's just as yummy as this one. I've heard of people putting vegetables like broccoli in smoothies as well... I don't think I'm ready to make that step yet.

Quick and Easy Strawberry Kiwi Smoothie
Makes: 1  Total time: 5 minutes

Ingredients
1/2 cup vanilla yogurt
4 strawberries
1 kiwi
1 tbs honey
4 ice cubes

Directions
Wash strawberries, cut off stems and cut into fourths. Cut a thin slice out of the middle of the kiwi for garnish, and spoon the rest out. Combine yogurt, strawberries, kiwi and honey into a blender. Mix on smoothie setting for 30 seconds or until ingredients are well blended. Remove the lid and add ice cubes. Mix on chop for 30 seconds. Serve immediately.

Tuesday, May 10, 2011

Chocolate Chip Cookie Dough Brownie Bars


I have finally purchased and started reading Anthony Bourdain's novel Kitchen Confidential. Being a student I rarely have time to read for fun, and honestly I'm a tough sell on books. I need to be fully absorbed in the first 50 pages of a book or else I'll never finish it. (It's a terrible habit, I know. I blame this on being born in the "video game era", a generation raised on cheap thrills and the birth of the Internet.) But because of my ever-growing curiousity obsession with the food industry, I was hooked on Kitchen Confidential at the introduction.

My favorite story so far is Bourdain looking back on his childhood vacations in France and recounting the moment he bravely and triumphantly swallowed a live oyster fresh out of the water, much to the disgust of his younger brother, and learned that "food had power." In his words, "It could inspire, astonish, shock, excite, delight and impress. It had the power to please me... and others. This was valuable information."


If I had to choose one recipe that signified the moment I thought of food as more than just food, it would be these brownies. A staple recipe of my mother's, this dessert began my love affair with food. It's the first sweet I loved, the first thing I baked, and the first food I was ever praised for by my peers. The biggest joy in cooking for me is knowing what I create makes people happy. This is my go-to last minute dessert, partially because I've never met someone who doesn't like them and mostly because they are the easiest. And how can you go wrong with anything that begins with "chocolate chip cookie dough"?

Wanna know the best thing about this dessert? I'll let you in on a little family secret... It's the Toll House chocolate chip cookie recipe, just put in brownie form! Now you're probably thinking, how unoriginal. BUT! The key to these melt-in-your-mouth doughy treats is how you cook them. You have to catch the timing just right so they're a little underbaked. That way, even the 3-day old leftovers have that gooey, fresh out of the oven taste.


If your mouth isn't watering at this point, something's wrong with you.

Chocolate Chip Cookie Dough Brownie Bars
Makes: 24 brownies  Prep: 10 minutes  Total: 30 minutes

Ingredients
2 1/4 cups flour
1 tsp baking soda
1 tsp salt
1 cup butter
3/4 cup sugar
3/4 cup brown sugar
1 tsp vanilla extract
2 large eggs
2 cups chocolate chips

Directions
Preheat oven to 375. Combine dry ingredients in a large bowl. Add butter, sugar, brown sugar and vanilla extract. Mix well. Add eggs one at a time, then add chocolate chips and mix until the dough is light and fluffy.
Spread the dough into a 9x13 greased baking dish and bake for 20 minutes. Remove immediately and let cool before cutting.

Sunday, May 8, 2011

Whole Grain Shrimp Pizza with Spinach, Tomato and Broccoli


I have a confession to make: I'm a planner. I like to plan my day in advance. What I'm going to wear to work the next day, what I'm going to cook for dinner, when I'm going to go to the gym... These are common thoughts prior to 9 in the morning. Despite my best efforts, occasionally I'll hit the grocery store with absolutely no clue what I'm looking for and stumble across one ingredient (usually a special) that jumps out at me. From there, my mind races with possibilities and somehow an entire meal falls into place. I came across some beautiful, pinked-up cooked shrimp at Whole Foods and decided to make seafood pizza for a dinner in with Dylan on Saturday.


I love making homemade pizza just the way my mom does, on a rectangular baking sheet with a thick, soft crust and loads of veggies. I stole a few tricks from my Aunt Deb for this pizza as well (or, as my Uncle Tim refers to it, "-za"). She bakes the pizza dough with olive oil and garlic for 10 minutes on its own to get it slightly crispy on the ends. Then, instead of using pizza sauce, she lays down paper-thin slices of tomato under the cheese and toppings. I've made plenty of homemade pizzas for Dylan before, and damn good ones too, but he raved that this was the best. Cooking the broccoli and shrimp in a lemon-lime creamy dressing before topping the pizza gave it an extra punch, and a mahi mahi dip with water crackers accompanied it perfectly. This was one of those meals that you throw together at the last minute and unexpectedly surprises you. I guess a little spontaneity can go a long way.


Whole Grain Shrimp Pizza with Spinach, Tomato and Broccoli
Serves: 4  Prep: 30 minutes  Total: 1 hour

Ingredients
1 whole grain pizza dough
1 tbs olive oil
1 garlic clove
1/2 large tomato, thinly sliced
1/2 cup shredded 3-cheese blend (asiago, fontina, and parmesan)
3/4 cup spinach
1/4 pound cooked shrimp
1/3 cup broccoli
1 tbs lemon juice
1/2 tbs lime juice
1/2 tbs mayonnaise
1 tsp coarse ground pepper
1 tsp chili powder
Additional cheese if desired

Directions
Preheat oven to 350. On a greased baking sheet, stretch and lay out your whole grain pizza dough. Drizzle olive oil and minced garlic in the middle of the pizza where the toppings would go and spread evenly with the back of a spoon. Place dough in the oven for ten minutes until the crust browns slightly.
In the meantime, chop broccoli into small pieces and cook in a lightly oiled pan. Peel the cooked shrimp and cut each shrimp in half. In a small bowl, combine lemon and lime juice, mayo, pepper and chili powder and mix well. Once the broccoli is almost cooked through, add the shrimp and this dressing and heat for several minutes until the shrimp and broccoli have absorbed most of the dressing. Remove from heat.
Remove the dough from the oven. Slice tomato from the horizontal center into paper-thin slices and lay on your dough. Sprinkle the shredded cheese on top of the tomato, and pile spinach on top. Carefully pour the shrimp mixture on top of the bed of spinach, drizzling any extra dressing on top of the pizza. Add a handful of additional cheese if desired and cook for 30 minutes. Let cool, cut into four large pieces and serve.

Monday, March 28, 2011

Baked Flounder in a Lemon Butter Sauce


I marched off to the store yesterday with the intent to purchase two hardy tuna steaks for a pan seared tuna dinner. One look at the price and I quickly changed my mind. Next to the tuna steaks, however, were these modest, glistening flounder fillets. I saw the $7.99 per lb price tag and thought, These will do!

Now, I've never been a big fish eater but people are always raving about the health benefits so I'm giving it a shot. I was afraid cooking fish would make my whole apartment stink, but it barely had an odor at all and it was the easiest dish to make! Serve with a side of baked potato slices and steamed vegetables and you've got yourself a guilt-free, satisfying meal.

Baked Flounder in a Lemon Butter Sauce
Serves: 2  Prep: 5 minutes  Total: 30 minutes

Ingredients
2 flounder fillets
1 tbs butter
1 tbs lemon juice
1 small garlic clove

Directions
Spray a baking dish with non-stick spray and lay down flounder fillets. In a small bowl, melt the butter and add lemon juice and garlic, mixing well. Pour over fillets and bake at 325 for approximately 25 minutes.

Saturday, March 26, 2011

Chicken and Squash Quesadilla with Mango Salsa


When I hear "quesadilla", these are the words that come to mind: grease, cheese, sour cream, guacamole, and more grease. Also, consequent stomach pains and caloric regret. I decided to try my own hand at a healthy quesadilla, using whatever I had in my fridge. The result?  A chicken and butternut squash quesadilla with a tangy mango salsa. The mango salsa is absolutely the standout in this dish; prepared only an hour before serving, it was a refreshingly light alternative to store-bought tomato salsa, but with the same spicy kick. Save the leftovers and serve over rice as a meal, or eat as a snack with tortilla chips the next day.


Mango Salsa
Serves: 6  Prep: 15 Total: 1 hour 15 minutes

Ingredients
1 mango
1 red pepper
1 jalapeno
1/2 red onion
1/3 cup cilantro
1 lime
Tabasco sauce

Directions
Chop mango, red pepper, red onion and cilantro and combine in a medium bowl. Cut jalapeno in half and dice; add to mixture.
Squeeze lime into a small bowl. Add 10 drops of Tabasco sauce. Whisk and pour over mixture. Toss well, cover and refrigerate for 1 hour. Serve immediately.

Chicken and Squash Quesadilla
Serves: 2  Prep: 20  Total: 30
Ingredients
2 boneless, skinless chicken breasts
4 whole wheat tortillas
1 cup mozzarella cheese, shredded
1 cup butternut squash, pre-cubed
Salt and pepper

Directions
Turn oven to broiler setting. Spray a light coat of olive oil on a baking sheet and lay down chicken breasts. Cook directly under broiler until no longer pink on the inside, about 10 minutes. Slightly cool and cut chicken into long strips; set aside.
Slice squash cubes into strips. Cook in olive oil on a large skillet until soft. Add chicken strips to skillet to reheat. Sprinkle mixture with salt and pepper and toss. Remove from heat.
Set oven to 350. Lay two tortillas flat on a baking sheet. Cover tortillas evenly with chicken and squash mixture. Add several spoonfuls of mango salsa, then sprinkle with cheese. Add top tortilla on each and bake in the oven for 10 minutes until cheese is fully melted.
Cut into fourths and serve with mango salsa on the side.

Friday, March 25, 2011

Caprese Pasta Salad


I originally made this recipe on a lazy day last summer. My friends and I were sitting by the pool craving a cool pasta salad. The original recipe was made with feta, but I decided to try fresh mozzarella balls and I'm happy I did. This meal takes 15 minutes to prep and is great served fresh, or cold the next day. Whether you're in the mood for a steamy hot pasta dish, or a cold side at a barbecue, this is the perfect recipe!


Caprese Pasta Salad
Serves: 6  Prep: 15 minutes  Total: 15 minutes

Ingredients
1 pound whole wheat pasta
2 cups of cherry tomatoes, halved
1 cup fresh mozzarella, chopped
1 cup basil, chopped
3 tbs olive oil
3 tbs vinegar
    Directions
    Boil water in a pot and cook pasta until al dente. Add tomatoes, mozzarella and basil to the pasta and mix well. Pour oil and vinegar over and toss. Serve immediately or refrigerate to serve cold.
      Related Posts Plugin for WordPress, Blogger...